
Custom SIM card in Tesla Model 3 2024+, Tesla Model Y 2025+ and Cybertruck – Oleg Kutkov personal blog
 All Tesla vehicles are equipped with eSIM or built-in SIM cards that provide 4G/5G connectivity for the car.
This Tesla SIM works only on official markets and is useless in “gray” areas. There is no connectivity at all in non-official regions. Installing a local SIM card can solve the connectivity issue.
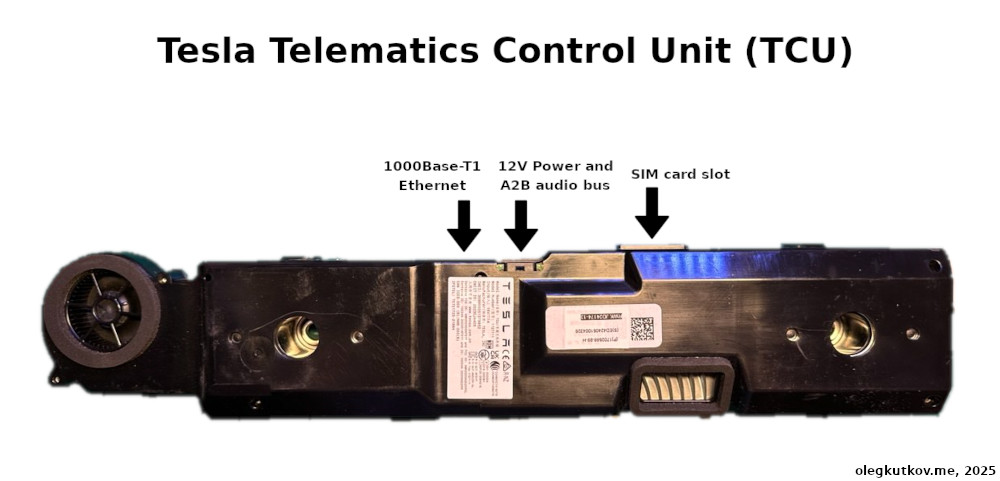
Previously, I explained how to replace the LTE modem and install a local SIM card on the original Tesla Model 3. With the newer generation of cars (Model 3 Highland, Model Y Juniper, and Cybertruck), everything has changed quite a lot. Tesla moved the cellular modem outside the main computer into a separate unit – Tesla Telematics Control Unit (TCU). This module incorporates LTE/5G modem, WiFi, and Audio Bluetooth. The TCU is connected to the main computer via 1000Base-T1 Ethernet.
Please note that TCUs for the European and North American markets (and most likely Asian) are slightly different. North American TCU might not support all the LTE bands in Europe and vice versa.
More on this TCU is to come, but today we will focus on SIM installation and configuration.
TCU location and SIM card installation
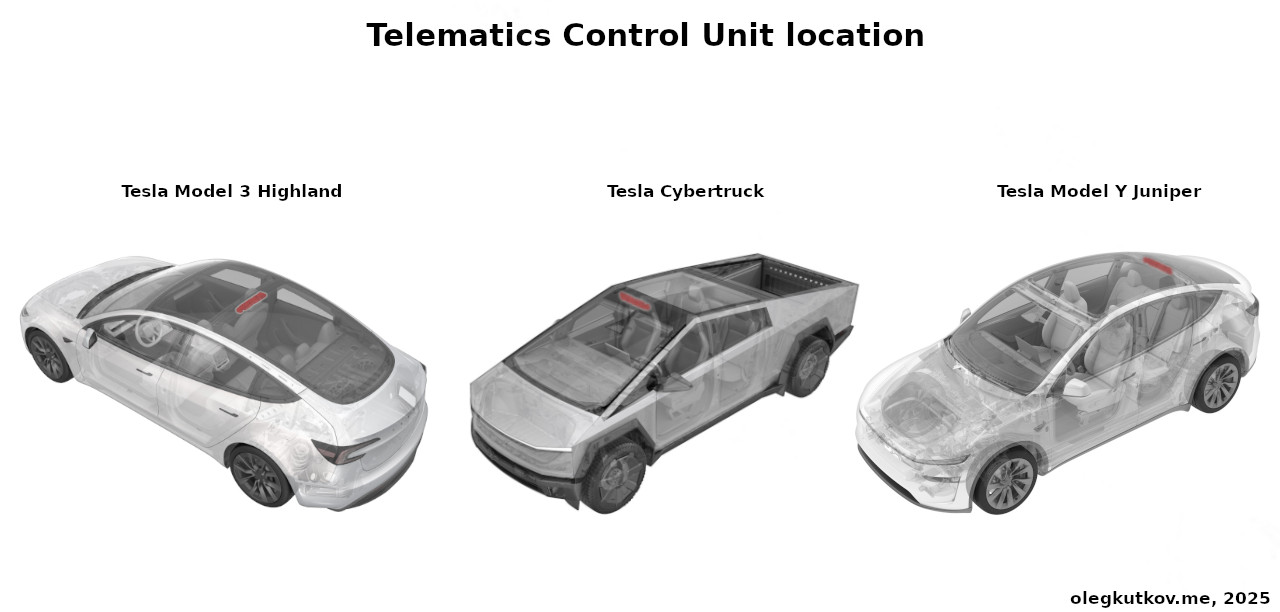
The TCU is located under the headliner. On Cybertrack, it’s the front headliner trim. On Model 3, it’s the center headliner beam. And on Model Y, it’s the rear headliner.
The teardown instructions for the three cars—Cybertruck, Model 3, and Model Y—differ. Please follow the official service manuals.
Since I’m driving Model Y Juniper, I will focus on it.
In the case of Juniper, everything is relatively easy.
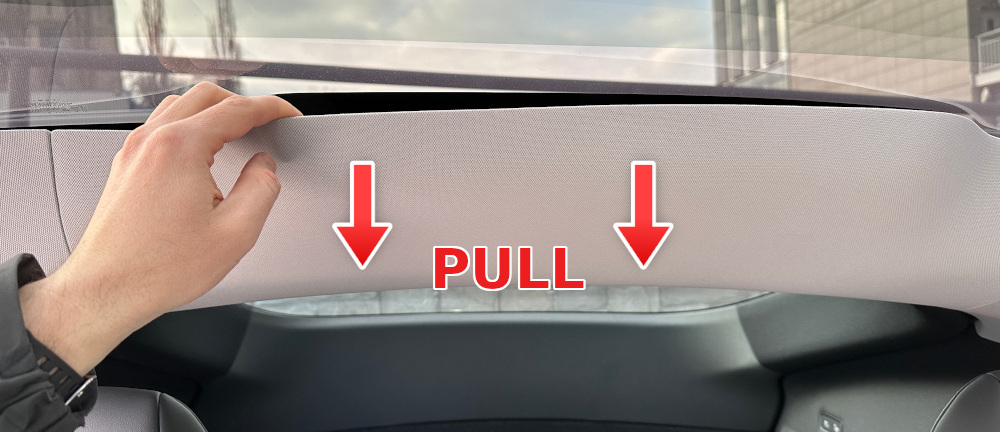
1. Gently pull the headliner to release the magnetic holders.
You can leave it partially attached. Just try not to over-bend it.
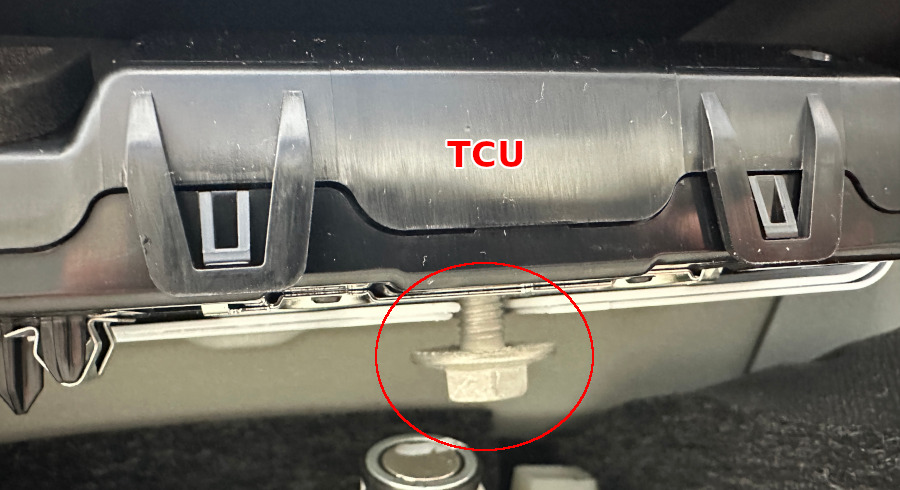
You should see the TCU fixed with two 13 mm bolts.
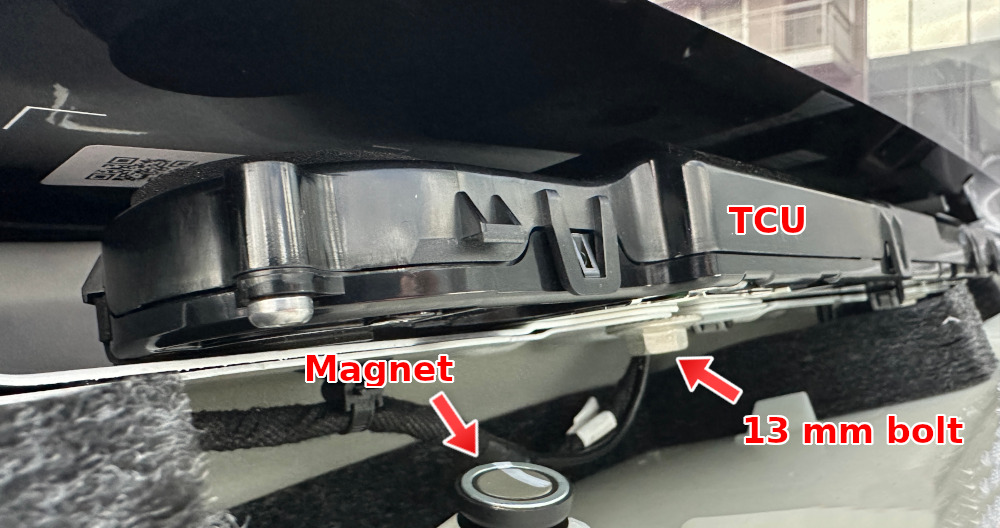
2. Use a ratchet wrench to unbolt the TCU. It should go easily.
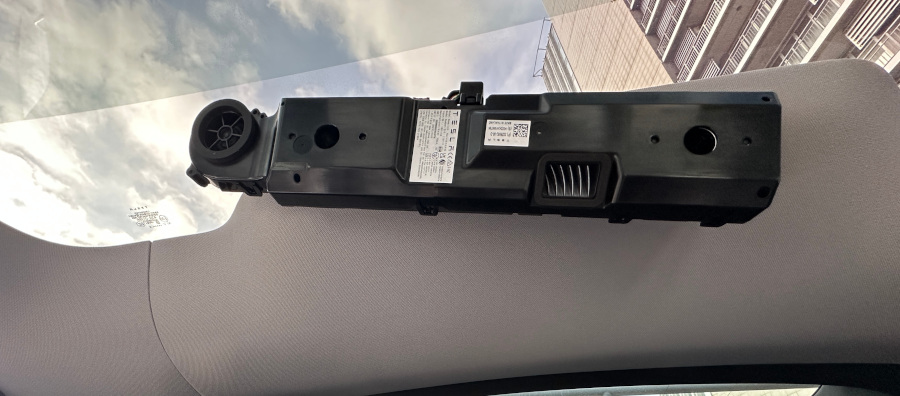
3. Carefully pull out the TCU and release the headliner.
You can leave it connected to the power and Ethernet. There is no need to move it far away from the headliner. Just be careful with wires.
4. Install your SIM card.
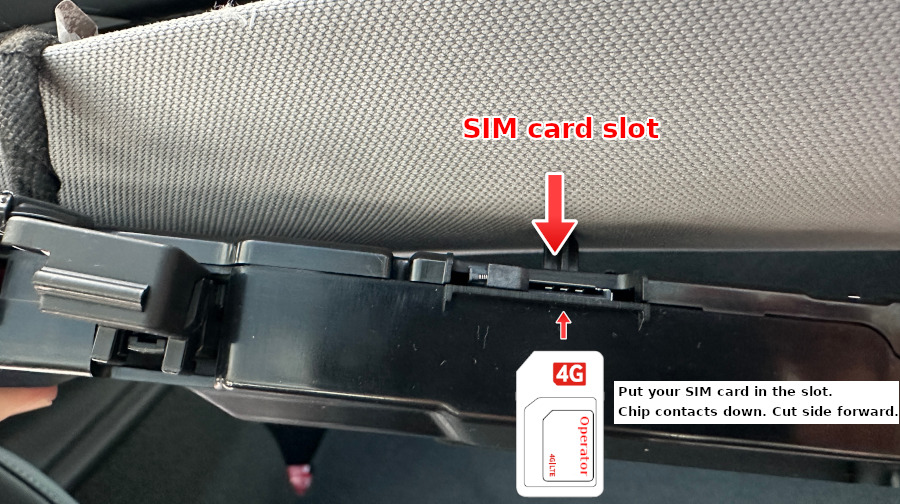
Put your SIM card in the empty slot on the TCU. Contacts down, cut side forward. A sliding lock should secure the SIM card.
5. Put the TCU back under the TCU and secure it with two bolts.
Use approximately 14 Nm of torque.
SIM card activation
By default, the TCU uses a built-in SIM and will ignore any SIM card installed in the slot. It should be switched to an external SIM. The only way to do this is through Tesla Toolbox and Service+ mode.
Optionally, you will need an OBD-to-Ethernet diagnostics cable.
The Tesla Toolbox is a web-based diagnostic tool for Tesla vehicles. It can access a local or remote Tesla vehicle by providing the VIN code and some permissions.
This tool is not free and requires a subscription. Currently, one-day access is available for relatively small amounts of money.
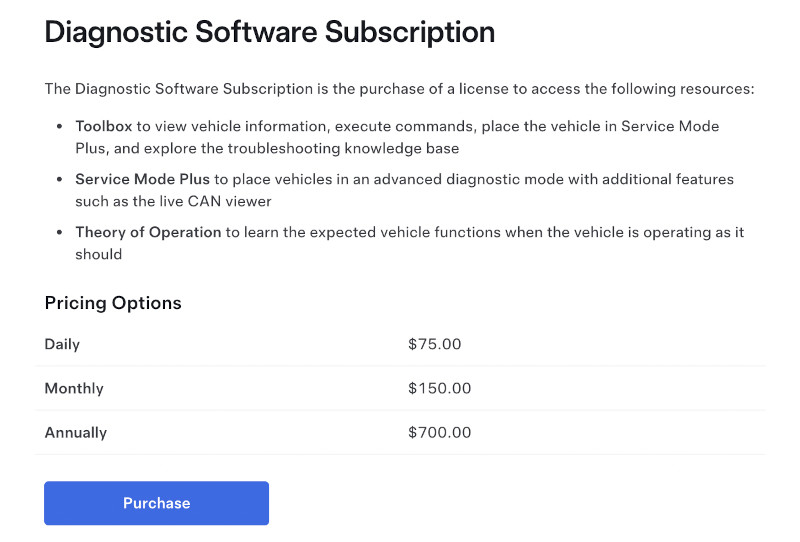
Go to https://service.tesla.com/en-US/diagnostic-software to purchase the Toolbox access.
Your car should be connected to the internet via WiFi.
Please note that you can only buy access to the Toolbox on supported markets. Thus, if you are in a “grey” zone, you need a VPN to a European country or the US. Any popular VPN service is suitable for this.
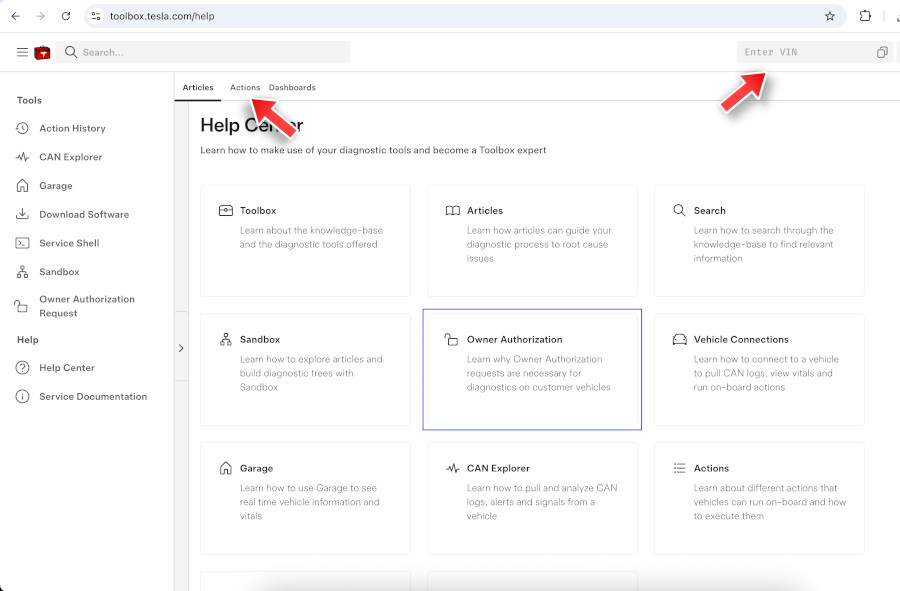
On the toolbox page, enter your vehicle’s VIN in the top right field and select Local or Remote connection.
You will find all the available actions under the “Actions” tab.
Remote connection requires additional “Owner Authorization”. It simply sends an authorization request to the owner’s email address. No further actions or hardware are needed.
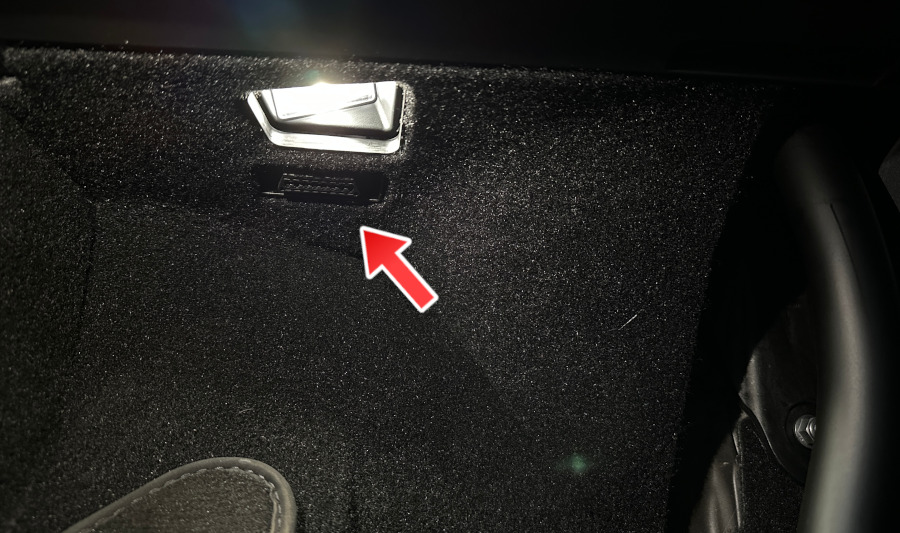
Local connection requires access to the car’s diagnostic connector, which is on top of the driver’s footwell, and a special OBD-to-Ethernet cable.
Please note that the local connection requires allowance of local non-safe content. This configuration depends on the browser you are using.
OBD-to-Ethernet cable
You can buy any off-the-shelf cable or build it yourself.
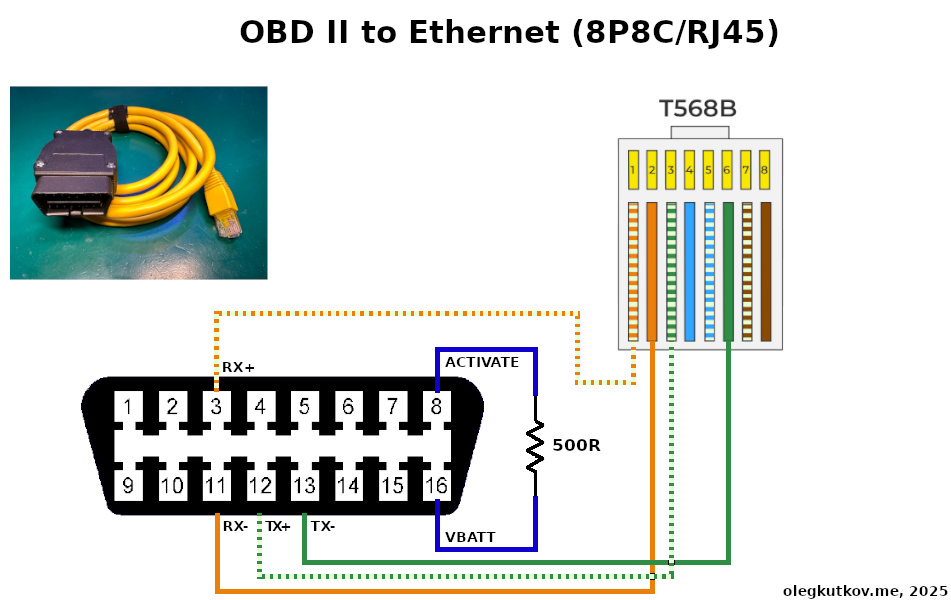
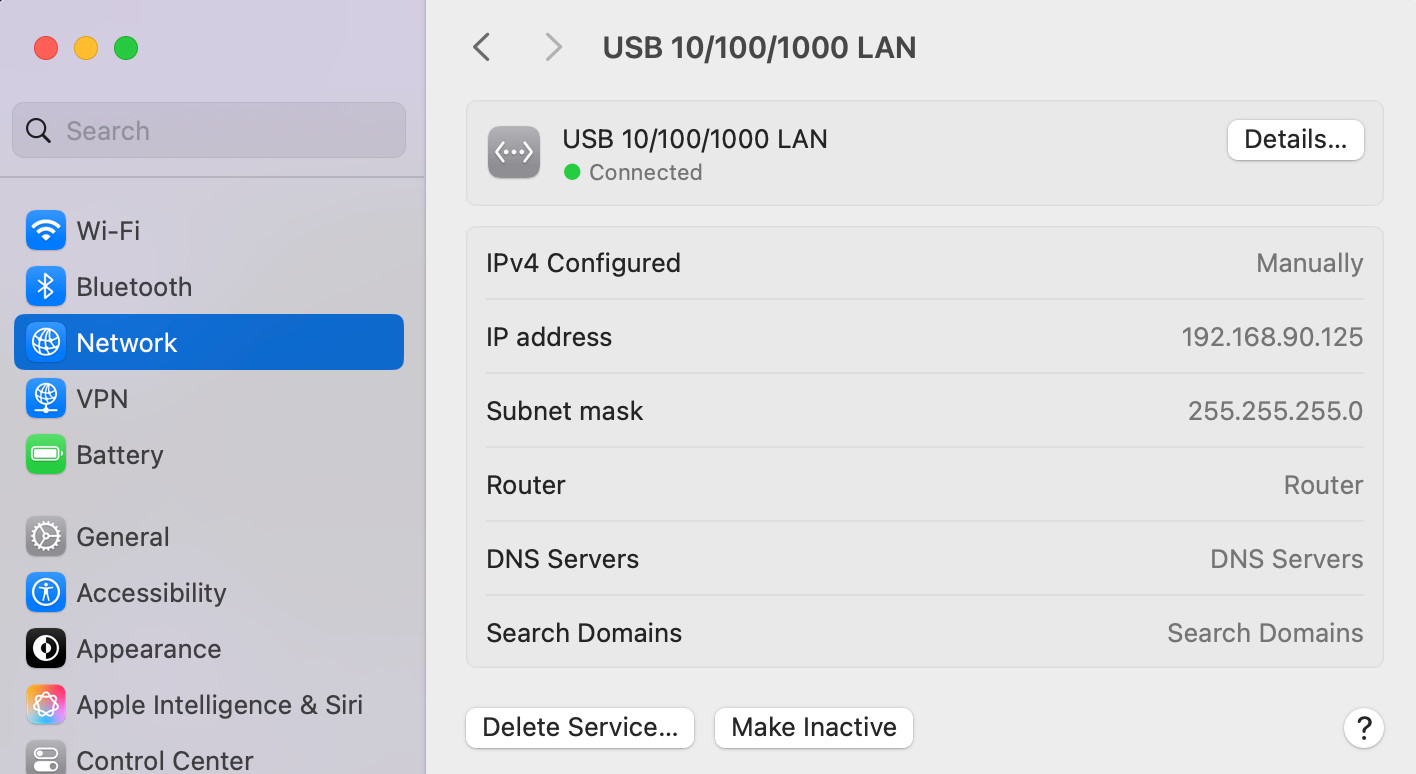
Configure the Ethernet interface on your computer to a static IP 192.168.90.125.
The Tesla computer (MCU) has the address 192.168.90.100, but ICMPs are blocked, so it can’t be pinged. However, the required ports are open.
Tesla’s computer should propose switching to Service mode after detecting the Ethernet link.
We can always switch to Service mode by going to the main Menu/Software, long-pressing on the car’s model, and entering the “SERVICE” code.
Service Mode Plus
In Service mode, we can do many things. Unfortunately, SIM switching is locked behind the “Service Plus“. Entering this mode requires the Toolbox action.
Go to the Toolbox Actions, find and click “Service Mode Auth“, and press the “Run” button.
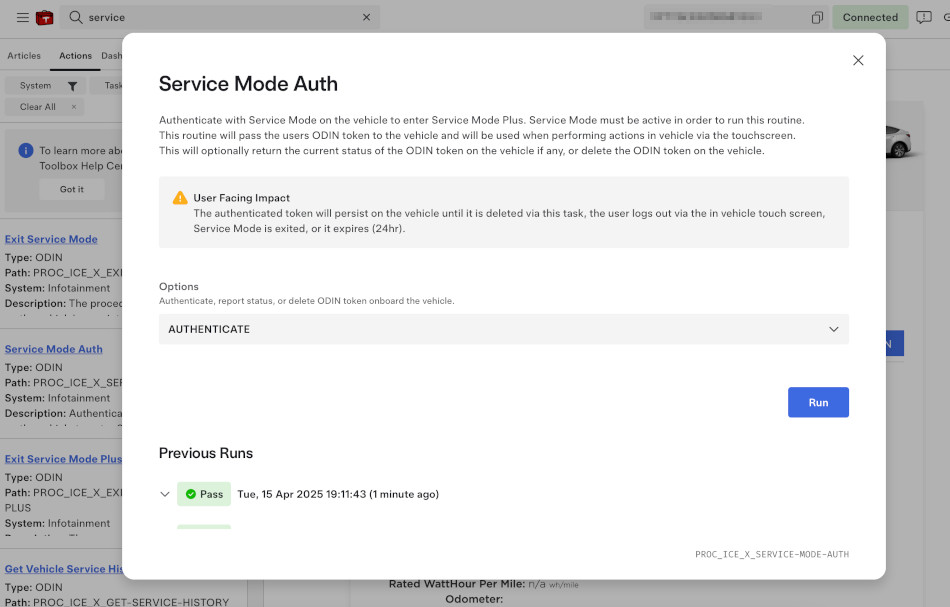
The car’s interface should switch to “Service Plus”. Now it’s time to switch the SIM.
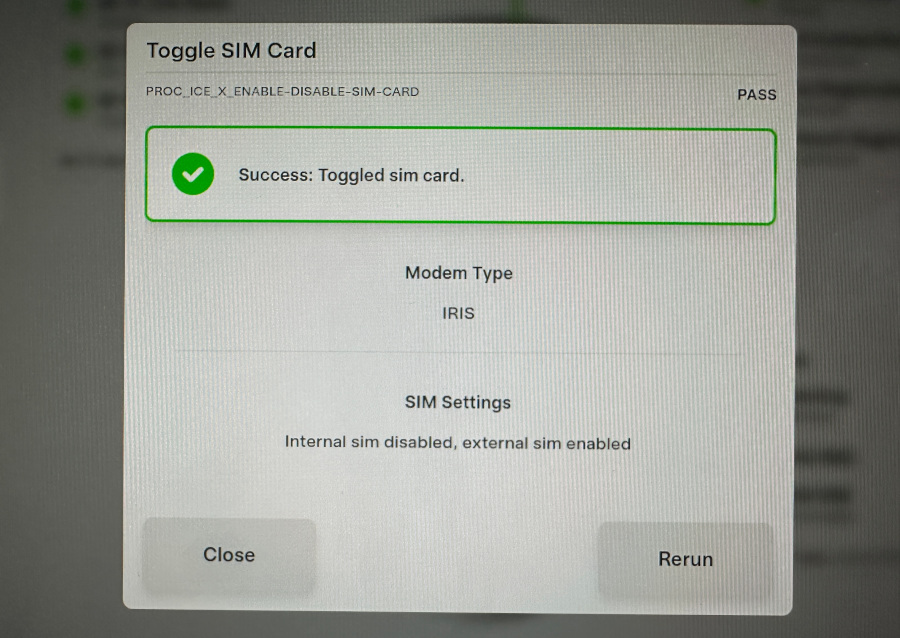
On the car’s screen, go to Infotainment/Connectivity and press “Toggle SIM“.
Then, select the External SIM and press “RUN”. This operation may take some time. The modem should be successfully switched to the external SIM.
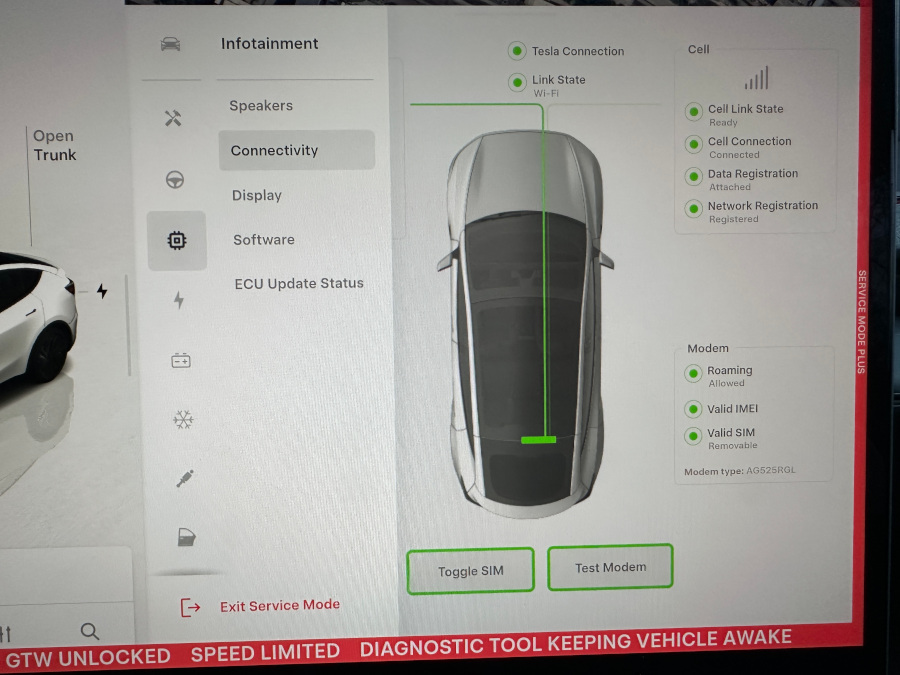
Close this window and wait a few minutes. The modem will try to find and register with your operator’s network.
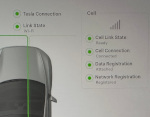
The Infotainment/Connectivity menu shows that the modem uses a “Valid External SIM” and “Cell Link State” in “Ready/Registered” mode.
The procedure is complete. To return to the normal interface, long-press the “Exit Service Mode” button.
Waking up the car
The native Tesla mobile application wakes the car by sending an SMS to the internal SIM card number. This number is registered in the Tesla database.
When using a custom external SIM, you must manually send an SMS (with arbitrary text) to your SIM number. Any SMS will wake up the car, and it will be available via the Tesla mobile app.
Don’t forget to unsubscribe your SIM from any newsletters to avoid false wakeups and extra power drain.
Thanks for reading.
Discuss this article on the forum: https://olegkutkov.me/forum/index.php?topic=126