🍰 How I Hosted My First Static Website on AWS S3 – A Beginner’s Journey with Flavors & Bakes
👋 Introduction
Hi everyone!
I recently hosted my first ever static website using AWS S3, and I wanted to share my experience in this blog. This is a beginner-friendly guide to help anyone take their first step into cloud web hosting—even if you don’t have any advanced coding or DevOps skills.
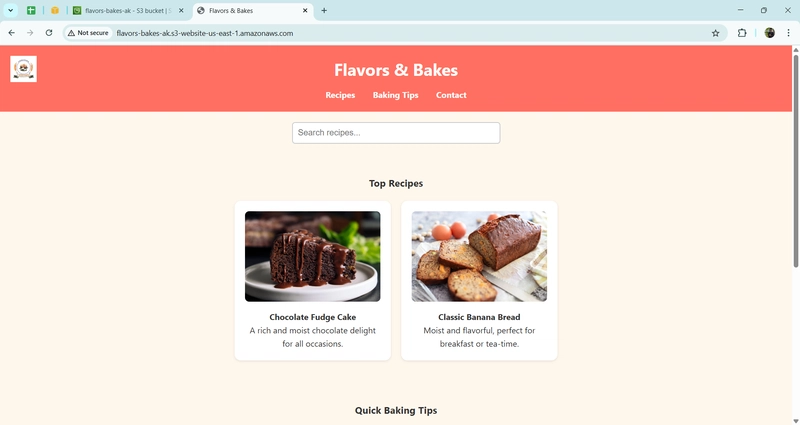
The project is called Flavors & Bakes—a simple website sharing delicious baking recipes like chocolate fudge cake and banana bread. 🍌🍫
🪜 Step-by-Step Guide: Hosting on AWS S3
Step 1: Create an S3 Bucket:
- Go to S3 Console: https://s3.console.aws.amazon.com/
- Click on Create bucket
- Enter a unique Bucket name (e.g., flavors-bakes-portfolio)
- Region: Choose your region (e.g., Asia Pacific (Mumbai) or US East (N. Virginia))
- Uncheck “Block all public access” → Acknowledge the warning
-
Click Create bucket
-
Setting config of S3 Bucket

-
Un check the Block all public access and check the acknowledge.
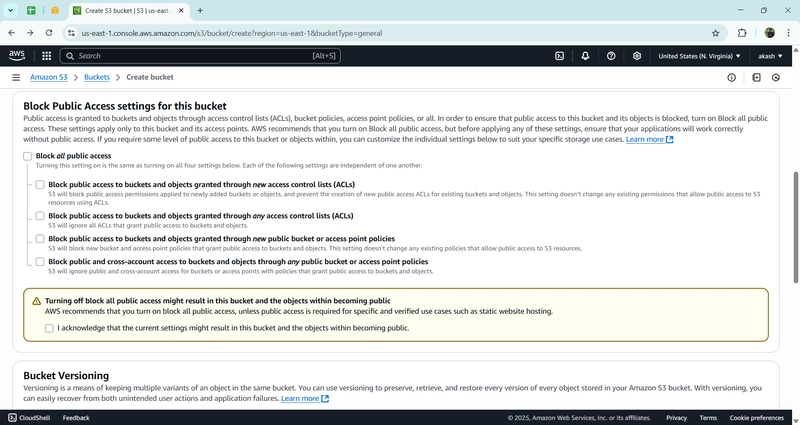
- Check the Bucket is created Successfully.

Step 2: Upload Website Files
- Click on your bucket name
- Go to Objects → Click Upload
- Upload all files: index.html, style.css, images, etc.
- After uploading → Click Upload

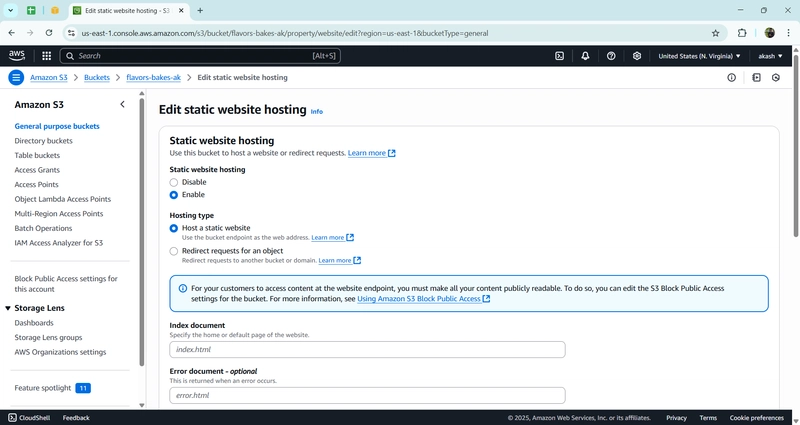
Step 3: Enable Static Website Hosting
- Go to Properties tab in your bucket
- Scroll to Static website hosting
- Click Edit
- Enable: Enable → Hosting type: Host a static website
- Index document: index.html
- (Error document is optional: error.html)
- Click Save changes
- select and upload all the files in object section
Step 4: Make Files Public
- Go to Permissions tab
- Scroll to Bucket policy → Click Edit
- Paste this public read policy (replace ):
{
  "Version": "2012-10-17",
  "Statement": [
    {
      "Sid": "PublicReadForWebsite",
      "Effect": "Allow",
      "Principal": "*",
      "Action": "s3:GetObject",
      "Resource": "arn:aws:s3:::<your-bucket-name>/*"
    }
  ]
}
- Click Save changes
- Set and save the bucket policy

Step 5: Test the Website
- Go to Properties → Copy the Endpoint URL

- Paste it in your browser
- Your website should be live and public!
🔒 Optional But Recommended:
Avoid Future AWS Charges
If you’re done with the project or want to be 100% safe from billing:
- Delete the S3 bucket once finished
- Or set up billing alerts using AWS Budgets
💡 Future Improvements & Ideas:
- Add a custom domain like flavorsandbakes.com
- Enable HTTPS for secure access
- Add a feedback/contact form using AWS Lambda or Formspark